Showing posts with label cooking tools. Show all posts

startin' the mornin' off right...


if there's one thing that is really important to me, it's breakfast. If there's one thing that I absolutely do not have time for during the week, it's breakfast. You see, when you have to get up around midnight and crawl into work, you tend to maximize the amount of time that you can stay in bed. I basically hit the alarm clock off, throw on some clothes, brush my teeth, and then head out. not leaving a whole lot of time to fill my body with nutrients. That's where my love affair with granola bars began. granola bars definitely fit the bill for a fast breakfast. however, most of them are fluff or far from anything resembling tastiness. I used to eat peanut butter cliff bars, but when you down five a week, they start to get expensive. A while back, I had made a batch of g-bars from a martha stewart recipe. In theory, they sounded great because there was no refined sugar or preservatives or anything of the sort, but in actuality, they sort of came up short for me. I think that I didn't like the whole tropical dried fruit nonsense or something, not my style. the one thing I did really like (and steal for this recipe) was the fact that instead of sugar, this recipe used simmered, pureed dates. they act as your binding agent and hold everything together, also adding another, earthily sweet dimension to this bar, something I can totally get into...
yeah, it seems like there are a lot of ingredients to this, but just hang in there and try it at least once. they are all something you can get at a grocery that sells bulk ingredients ( I picked all of my stuff up at super saver on 48th, with the exception of the local honey, found at open harvest). At first it may seem like a lot to buy, but if you make this once, it won't be a waste, because it will definitely get reruns...
wunderBARS:
you're going to need: a food processor/chopper, biggest sheet pan you have, big mixing bowl,
and your mitts...
start with:
turn oven to 350F
2 cups pitted dates--put these in a saucepan and cover with water. simmer without a lid for around five minutes, or however long it takes to assemble the rest of the stuff
3 cups old fashioned oats, finely ground in a food processor
2 cups walnuts, coarsely ground in a food processor
1 cup almonds, coarsely ground in a food processor
2-2.5 cups dried fruits of your choice (lately I have been doing dried cranberries and dried currants, but you can use whatever you like. Raisins are good in here, but so are cherries, blueberries, etc)
4 tbs oat bran
6 tbs ground flax seed
4 tbs wheat germ
1 tsp coarse salt
6 tbs local honey (make sure to get local if possible, it fights off allergies/asthma. etc, honey that is foreign to the region doesn't do this)
1 tsp cinnamon (optional, I stopped adding this, as i found it unnecessary, but you can decide for yourself.
ok, here's the do:
combine ground oats, ground nuts, the dried fruit(s), oat bran, ground flax seed, wheat germ, salt, and cinnamon (if using) in a big mixing bowl, give it a little mix. drain the dates, leaving a couple of tablespoons of water in the pot, and pour this into the food processor. add the honey and puree everything until smooth. go wash your hands. do it. they may seem clean, but just do it anyway. clean? ok, now pour the date mixture over the rest of the ingredients and use your hands to mix everything up uniformly. it's sticky, but that's ok, you have to do it this way or it just won't get fully mixed. the dry ingredients should look moist and it should be slightly tacky to the touch. spray your big sheet pan with cooking spray and transfer the mixture to the pan. don't worry if it doesn't extend to the end of the pan just try and get a uniform rectangle going with about a 1-inch thickness. pop into oven for around 30 minutes. bars will be done when edges start to darken and middle is set. now, if you happen to have a vacuum sealer, let these cool and make individual packages for your breakfast for the next two weeks. if not, I'm sure they will last quite a while in just plastic wrap.
non-foodstuffs: we recently adopted a 9 year old english setter. who has kennel cough. who has proceeded to give kennel cough to gus. I miss sleeping.
DISH recommends:Fagor 6 qt duo pressure cooker. I made a curry in 4 minutes the other day people. FOUR minutes!! I almost cried. I am loving this thing. get one. it will change your life...or at the very least, dinnertime.

"that roma's hot, for sure, but I've got my mind set on "fleur"

If you thought about your vegetable garden like it was a high school, then cauliflower would be the timid, shy girl that is actually quite fetching, if only someone would give her the time of day. Not like that showboat, "sweet corn", his silky hair, and towering height, the envy of all the class. or what about that tramp, "tomato", those wicked curves and blushed skin, always saying, "go ahead, give me a little squeeze, I don't mind ;) " and btw, she's been paired up with just about every vegetable possible (girlfriend gets around...)
and then, there's cauliflower...I mean, it looks like a friggin brain, people. who wants to eat a brain (ok, let me rephrase that, who wants to eat a brain when it's not tucked inside some delicious ravioli or made from jello...cause I would eat either of those things)?!? If it weren't for a little ingenuity and a little makeover, we might never tap into the potential that lies within this smart little vegetable.
Cauliflower on it's own and uncooked is, let's be honest, less than stellar. it has a nice crunch, but I imagine that locusts and crickets do also. it's very pale. it needs a tan. and a spicy outfit. we get this by a trip in the saute pan with some olive oil, sea salt, fresh ground pepper, and some chili flakes. now it's ready to party. throw on some grated parmesan if you want to hit a home run (leave it off if you just want to make it to 2nd base:)
crispy sautéed cauliflower
(I like to cut my pieces vertically into sections about 1/2 inch thick. this way, one individual section is a single serving. also because it looks, like, totally awesome. also also, I really like this method because the cauliflower gets all golden and crispy on the outside, almost as if it were dredged in flour and deep fried.)
1 head cauliflower, cut vertically, into 1/2 inch slices (see pic)
olive oil
coarse sea salt, peps
chili flakes
grated parmesan
lemon wedge (optional. i squeezed this over mine at the end. was delicious, forgot it for the pic)
heat a few glugs of olive oil in a saute pan over med heat until shimmering. add cauliflower and let cook until golden brown (approx 5-6 mins), turn (carefully, she's sensitive) and repeat. season browned side with salt, peps, and chili flakes. check for doneness by piercing stem with a pairing knife, should be tender, but not mush, set on platter, newly-browned side up and season again. grate cheese over, give a squeeze of lemon and enjoy. I like this paired with lots of things. It's also good alone. it's also good if you are with somebody...
ps. I suppose you could do this in the oven. I suppose...
DISH recommends: All clad saute pan. I use this all the time. it has fast become a workhorse in my new kitch. kind of pricey, but will last forever.

Mastering Pommes Frites...or...Les Halles fare (in love and cooking)


If you've ever tried to make some decent fries at home, I'll bet they most likely sucked. now hold on there, you might be appalled and might be cursing my name in defense of your flabby, greasy tuber sticks, but the truth is the truth. hey, I'm just as guilty as the aforementioned crime against potatodom. until yesterday, that is. I had made fries before and they were nothing spectacular. you use a lot of oil and there's all the clean up and, blah, blah, blah. you get it, I know.
A couple of weeks ago, mames surprised me with anthony bourdain's Les Halles cookbook. I had borrowed this from a friend before and while it was full of good recipes, I remembered that few of them looked like things I could make with the resources we have here ( where do I find wild boar, rabbit, foie gras, etc). apparently,at the time, I didn't see the recipe for fries, because once I laid eyes on it, I knew I would have my glory day in the hot sun with this process.
you can't really stray from this recipe and get the same results. Do you have to use peanut oil? YES! that much of it? YES!! do you really need a candy thermometer to get accurate temps? ummm....I feel like you guys get the point by now, but, YES! also, you must use russets, try to get really long ones (I used "baking" potatoes). I used 1 quart plus 1 pint of peanut oil in a 3.5 quart pot. and had to do the recipe in 3 batches.
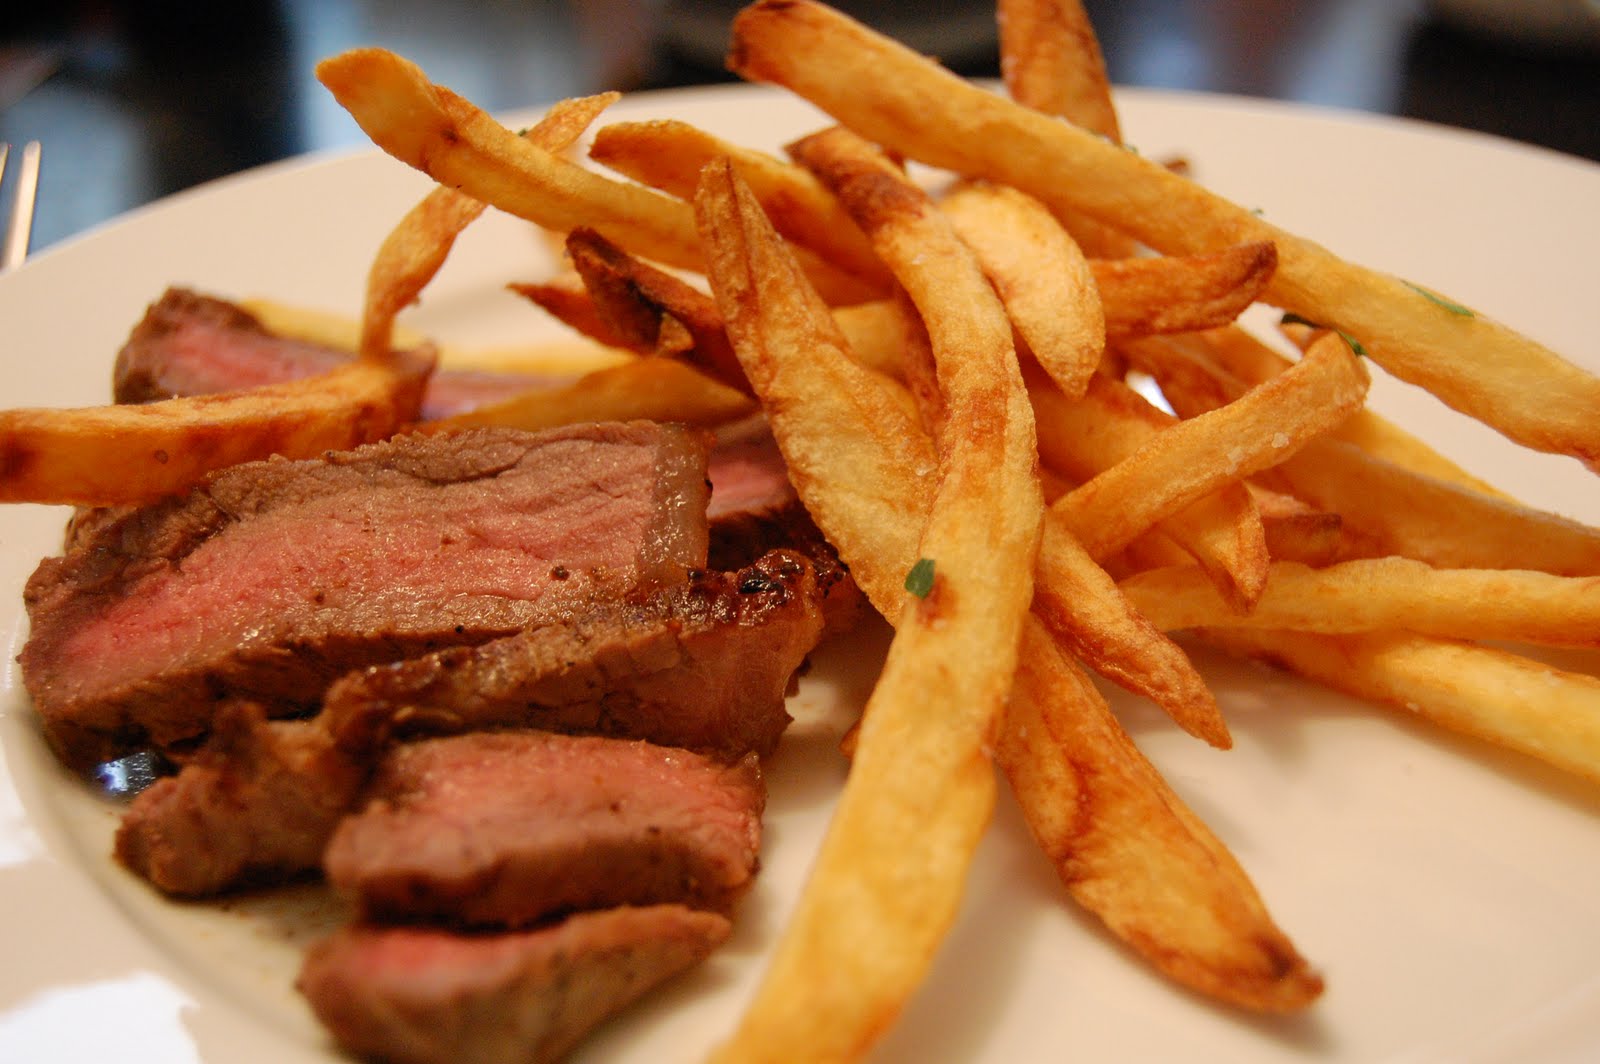
one last thing: These are the best thing ever. crispy, not greasy at all, tender and fluffy inside, you get it, I know. make them. and invite some friends over. would be great with a nice aioli, or serve with a steak for steak frites. enjoy.

french fries, pommes frites, or whatever you want to call them: (adapted from les halles cookbook) (probably should of served four...)
3 russet potatoes, (big long ones)
1 quart plus one pint peanut oil
salt
parsley chiffonade (its for pretty)
could also season with: cajun seasoning, or a combo of parsley, lemon zest and minced garlic (have had this before and loved it)

peel the potatoes and cut them into 1/2 inch sticks. don't go too skinny, mames and i decided that the 1/2 inch ones were perfection. put them into a bowl of iced water to prevent oxidation, and leave for about 30 minutes, rinse well to get rid of starch.
put your oil into your pot and heat it up to 280F (see, that thermometer is handy right about now). what we are essentially doing here is blanching the fries first. cook the fries in batches for about 6-8 minutes. their color should be a semitranslucent white, not browning yet. remove with a skimmer and drain on a paper-towel lined baking sheet. let rest about 15 minutes.
now we are ready to fry! bring the oil up to 375F and fry the potatoes in the same sized batches for 2-3 minutes until crispy and golden brown. remove from oil with the skimmer and place fries in a large bowl, lined with paper towels (or just a clean, dry towel you don't mind washing later) sprinkle with salt (i just used plain, old kosher salt, but you could get all fancy pants and use whatever you want) and then whip out the towel, toss the fries a bit to incorporate seasoning and serve hot.
even though i did these in batches, the first batch was just as good as the last, even with the wait-time. they don't take a long time to fry after the blanching so you definitely have time to finish the process before you devour them, if you want to wait that long:) Also, after i was done, I let my oil completely cool and just funneled it back into the original bottle, ready to use for next time. thriftster...

DISH recommends:Les Halles cookbook. certainly hit a homer with that fry recipe. And I have tried the coquilles st. jacques recipe and it was equally good. check it out.

too much of a good thing is never enough???

right now I should probably be sleeping. I should be covers-to-chin in sleepsville, but I can't stop thinking about lasagna. now, for me, this is quite a shocker. I'm not what you would call a huge fan, especially not when it comes to meat versions. I have been known to make some veggie lasagnas in the past, and while they were good, it's not something I found myself thinking about the next day. The problem I have with this classic dish is that it is (99% of the time) just so dang heavy. It's usually made up of a pound of meat, a pound of cheese, oodles of noodles (wait, why don't I usually like this?), and sadly, it's just not that good. I have to credit a jamie oliver recipe for changing my mind on this one. Somehow, he managed to cram all things good in the world of lasagnadom into this dish, yet still manage to make it seem not overly cheese-laden, and really well balanced. I adapted a little bit for what I had on hand. I also did this in two stages, making the sauce earlier in the day and then when I was done with my nap, I assembled the final dish.
This would be a great weekend dinner to break bread over (bread from LeQuartier, that is!), or you could assemble ahead of time and refrigerate (or freeze) for later.
Lasagna Bolognaise (adapted from j-ol)
1/2 pound ground beef
1/2 pound ground pork
1 onion, minced
3 cloves garlic, minced
1 red bell pepper, small dice
drizzles olive oil
1 red chile, de-seeded, de-veined, small dice
handful of fresh basil (stems and leaves separated), leaves picked and stems minced
2 14 0z cans tomatoes
2 tbs tomato paste
healthy splash(s) of vermouth (optional...as in you have the option to leave this out if you want your final product to be lacking the sweet kiss of an apertif:)
salt and pepper
2 tsps dried oregano
lasagna noodles (I used 1 box of the flat, barilla brand)
1.5 cups ricotta cheese
.5 cups sour cream
2 oz. grated parmesan.
tomato slices
for sauce bolognaise (can be made ahead of time and frizzled, or even freezled. also, would be great over your favorite pasta)
heat a saute pan with olive oil over med. heat, when oil shimmers, add onion, bell pepper, garlic, red chile, basil stems and saute until just starting to get some color. season with a little salt,pepper, and oregano and then add your meat (you could just use beef or pork, but I thought the combo was a really good...combo) and saute until almost cooked through, stirring frequently. add some serious splashes of vermouth and scrape up the yum yums from the bottom of the pan, now, add your tomatoes, tom. paste, half of your basil leaves (you can cut/chiff them if you want, or just leave them whole)and fill up one of the cans with water and add that too. and now we reduce. You want this to end up like a thick pasta sauce. if you don't reduce enough, you'll get a watery lasagna, and no one, I mean NO ONE, likes a watery lasagna. once it is to your liking, let cool and either assemble, or store for later.
assemblage: get a pot of salted water boiling and add the lasagna noodles, just for a couple of minutes to slightly soften them, drain, and drizzle with olive oil to prevent them sticking together. grate your cheese, set aside, and then combine the ricotta and sour cream. I used a 9x13 pan for this and actually ended up a little short on the sauce, so I think it was originally meant for a smaller dish, so keep in mind that you need to either make more bolognaise, or you'll have to improvise, yay! if you use the pan I did, here's what you do: ad about half your sauce into the bottom of the pan, don't be scared. then add a layer of noodles (I did 4 overlapping each other). now, add your ricotta mixture(try to use 1/3) and spread to cover said noodles, sprinkle 1/3 of your parm over the ricotta and then add another layer of noodles. add the rest of your meat sauce, a layer of noodles, a second layer of the ricotta mix, and another sprinkle of parm. one more layer of noodles, then add the rest of the ricotta mixture. now lay some thin slices of tomato across the top and tear some basil leaves and scatter them over the tomatoes like your the business (because, honestly...you kind of are. seriously peeps, you just made a lasagna people are going to gossip about...hard). sprinkle with the rest of parm, cover with foil. you can now either bake (375 for 20 minutes, uncover and then bake for an additional 35 minutes until golden and bubbling (the lasagna, not your ego).
ps. if you be freezing this, let it come to temp before you bake it, you could ruin your pan, and the dinner inside it:(
DISH recommends: jamie olivers food revolution. gets used a lot around these parts...

mine's Orbit peppermint...


I am by and large an autumn person. I'm usually all about the fall months, but right now, I'm definitely having a summah... What has brought about this mysterious change you ask? I'm not too sure myself, but I think it may have something to do with nectarines. I realize this entry is completely void of any nectarinesque photos/desserts/sauces, etc., but that's because, well...I usually eat them before I can make anything out of them. I used to be a little up in the air about fruit. I like fruit and all but I've never had a favorite...until yesterday. I had washed a nectarine and took my first bite, and it was pretty much one of the best things I've ever had. So juicy that I had to stand over the sink. I felt (and looked) like a hyena devouring a zebra. I felt like all fruit should be eaten this way...in private, without any onlookers to detract from the annihilation. When it was gone, I actually sucked on the pit for a while as to extract any remaining goodness. I can foresee this being a problem, like I am going to have a real problem when the season is over.
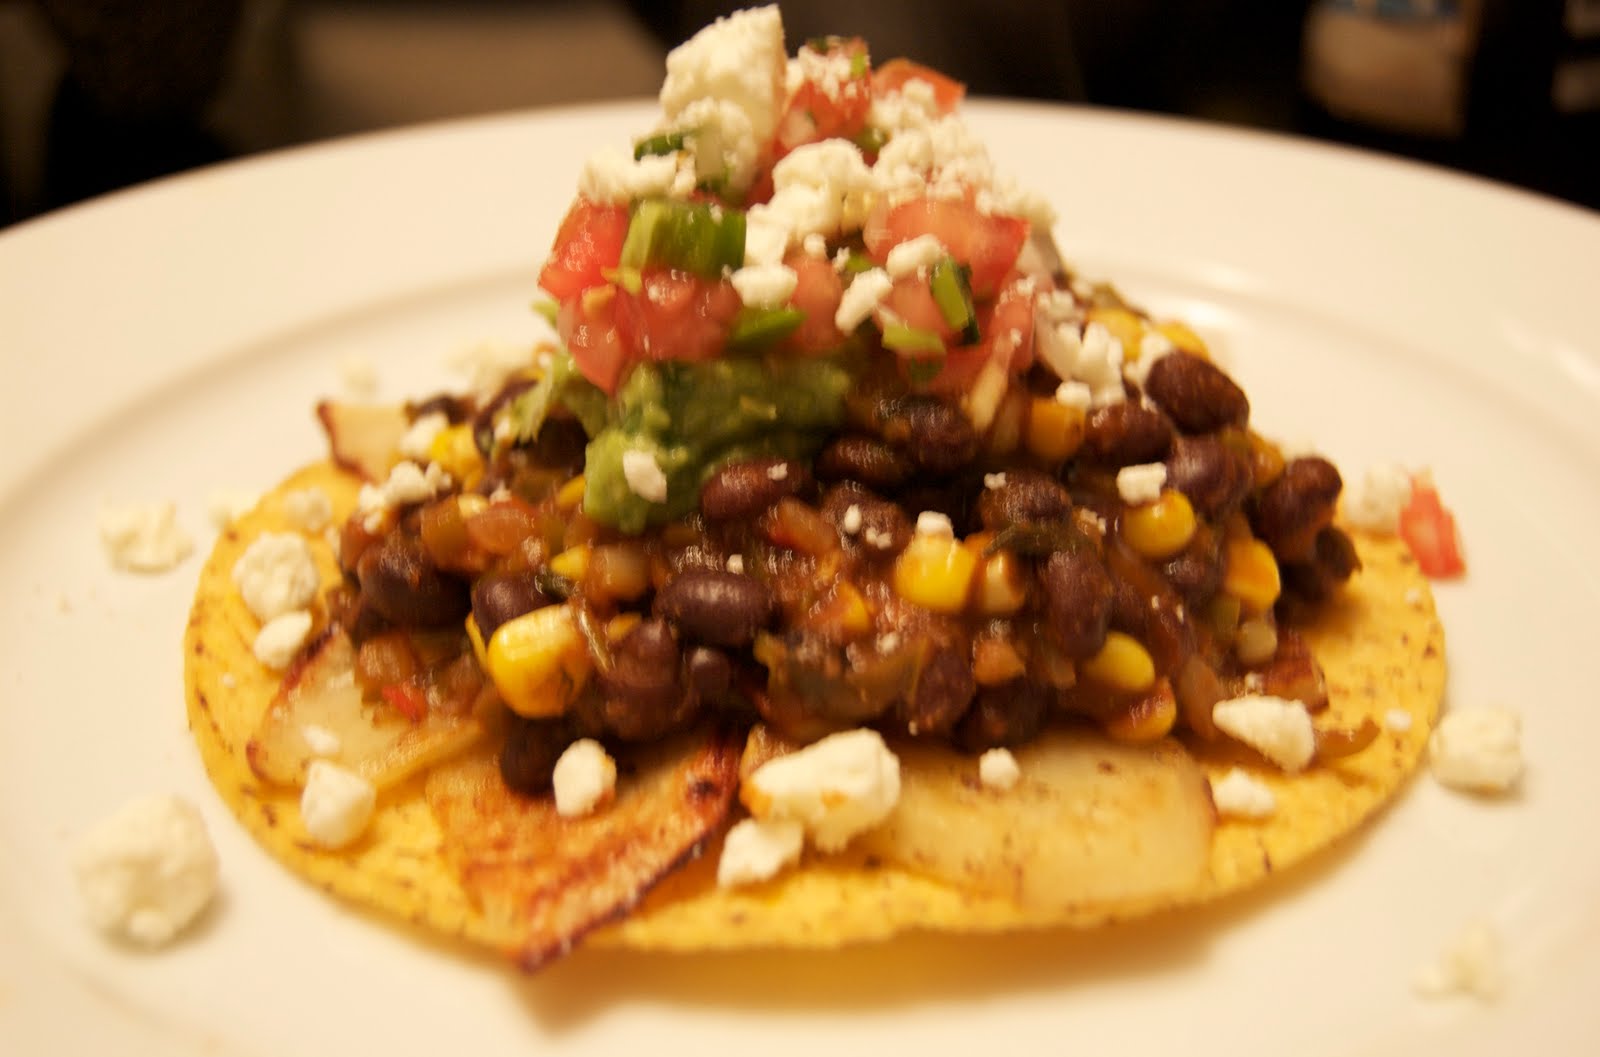
Another sign of summer for us has been eating a lot more vegetarian dishes (with the exception of that big, beautiful t-bone, there). With produce in such great supply right now, it's so easy to make great food (the veggies do all of the work for you). Pics up above are Thai-style stir fried veggies (super easy, just stir fry chosen veg in oil and then add some oyster sauce, fish sauce, soy sauce, hoisin, and a little stock until it thickens up a bit.) next pic is a t-bone with grilled potato chips and braised collards. Also made some awesome yellow curry that we threw some leftover chicken in (this is a great way to use up leftover grilled or roasted meats). The last dish is one that I promised I would post and that I can't quite get enough of. In it's simplest form, it is just a roasted potato and bean tostada, but one bite will have you thinking it's anything but simple. there are a lot of flavors going on here that just seem to work really well together. now, if you don't constantly have a summer supply of homemade pico de gallo and guacamole on hand, this may take you a little longer, but never fear, I have recipes for both. For the guacamole, just see the last post and watch the vid...easy.
the pico is just about as easy and can probably be made in the time it takes to watch how to make the guacamole.
pico de gallo
2 nice sized tomatoes, diced (4-5 if using romas)
1/2 -1 onion, diced small
1-2 jalps (i cut mine into quarters and de-seed most of them, leaving one or two quarters seeded, and dice super small. /i reserve the seeds and membranes and then add them in to taste, later.
juice of 1 lime
handful cilantro, minced
salt to taste
combine all of this stuff in a bowl and mix thoroughly. now, this is basically just a guideline, I probably make this a little bit different every time, so just taste it and tweak it however you like. I like to eat this with corn chips (obviously), but is a great topper for grilled meats, and any mexican foods.
the potatoes: this is easy, see the tates in the pic up above? you want to cut them into that size, toss with olive oil, salt, and pepper, and just lay out on a pan and roast them at 400F until they are tender and start to turn golden brown. set aside...you can eat one though, just to check...I said one, not a quarter of the pan (this is a note to myself...have no self control with potatoes...in any form)
ok, onto the other stuff:
Roasted potato and bean tostadas: (this is from memory, so might need a little tweaking:)
you will need:
olive oil (drizzles and glugs)
1 large onion, small dice
3 cloves garlic, minced
1 jalapeno, small dice (can de-seed/de-vein, if desired)
2 poblano (pasilla) peppers, diced, could use green/red bells if you like, I prefer the poblano for the flavor it gives
large handful minced cilantro
3 tomatillos, diced
2 potatoes thinly sliced and roasted (see above for details)
1 can black beans, rinsed
1 can pinto beans, rinsed
2 cans (8 0z.) tom. sauce
2 tsp. coriander
1 tsp. ground cumin
1 tsp. chile powder
1 tsp. cumin seed
tostada shells
(it is a good idea to heat up your oven while you are prepping all of the ingredients so you can have your potatoes roasting and finished by the time everything else is ready. also, when the potatoes are done, it would be a good time to toast your tostada shells (in oven at same temp, I'd even use the same pan as the potatoes, just make sure you have taken the potatoes off the pan:), they only take a few minutes, set a timer or you will forget, at least, i always do:)
start roasting your potatoes.
in a large saute pan over med-high heat, saute the onion, garlic, and peppers in olive oil until just getting some color, about 5 mins. add the cilantro, tomatillos, and spices (including a good pinch of salt and pepper) and saute for a couple minutes more. add the tomato sauce and fill both empty cans with water. pour one of the cans in, and reserve the other. stir until the mixture starts to thicken, then add the drained/rinsed beans. turn your heat down a little and let the mixture thicken again, add the rest of the water, stir and let thicken one last time (seems like a lot of reducing/thickening, but I do this because when you reduce/thicken things, the flavors get really concentrated, leading to a better end-product.) you want the beans to be pretty thick so they stay on the tostada. turn to low/warm. now it's time to assemble. I usually do a layer of potatoes, then the bean mixture, some guacamole, then pico, and sometimes i will add some cheese (usually feta or cotija) and finish with some minced cilantro. this recipe serves quite a few hungrys.
recommended garnishes are guac, pico, cilantro, crumbly cheese, or any other salsas you might like. this recipe leaves itself wide open for interpretation, so have fun with it and play around until you find your perfect summah combo!
ps:I realize there is corn in the tostada pic up above. if you want to add some to the mix, I just used one ear's worth, and added it when I added the beans.
DISH recommends: a Molcajete. yeah, you can make guacamole using something else, but I warn you, it pales in comparison. something about that lava rock...this is the cheapest one I could find on amazon. unless you live in lincoln...and want to take on the task of seasoning your own. If so, go to la Mexicana, 15 bucks, but I don't recommend it, it's worth the extra money just to get already seasoned (speaking from experience:)


booyah alert!!!!!...or are you seriously serious?!?/ take that omaha...

This is the face of mames commanding you to check out her blog (which is actually very informative, concise, and helpful to boot!)for info on bicycle awesomeness (should be cool, plus free quesadillas!)
this is also the face of mames telling me not to pick up (and telling you to pick up!) the super sweet white wusthof ikon chef's knives and slicing knives that are on clearance at tjmaxx right now in lincoln (69.00 clams for the 9" chefs, and only 49 for the slicer!!!!!). I thought about it, but c'mon, can you see how serious she is? they are back in the clearance section. thank me lates alligates...

all I really need is a skillet...all I really want is a sink...


The Cupboards are gone (along with the countertops), the kitchen sink is awol, my dishwasher is in the basement (along with new stove, cabinets, and exhaust hood), I don't even really have walls or lighting in the kitchen, but for the most part...I'm fine. But so help me, if someone were to take away my cast iron skillet, I...would...freak. It would literally be a scene out of "falling down." I have come to rely pretty heavily on this thing for its versatility and easy cleanup (or should i say wipe-out). Some people are grossed out by the fact that you don't really wash these, but when you are doing dishes in a bus tub in your bathroom, you get over it really fast. basically you just rinse these out with water (you can use a scrub brush if you need to) and wipe them out with some paper towels. the more that you use them, the more nonstick they get. The three dishes above were all made in the cast iron and all turned out really well. the one addition I would suggest getting would be a lid. You can use foil in a pinch, but it's kind of wonky looking and you are better than that. you could buy the matching one (that costs just as much as the skillet) or you should be able to pick one up at any random store or you might already have one that fits in your collection.

ok, ontootherthings:
Lets talk about food...obviously have been making a lot of one-pot/dish meals lately. actually, that's kind of a rule right now since washing dishes is a total pain. we've been trying to keep it interesting with stir frys, curries, and braises, but have also tried to grill once in a while. The food above is: braised beef brisket (a backlog st. patty's day pic), shakshuka, and irish bacon and eggs. Irish bacon is something that I'd never had before. the package said that it contained 60% less fat than regular bacon, and since that's a reason I LIKE regular bacon, i was a little skeptical on how it would be. It was sort of like someone shaved slices off of a porkchop, but in a good way.
nonfoods: bowled the worst game of my life on saturday night (may or may not have been around 60...), but also had some of the most fun. I'm exploring the maze of electrical wires that past homeowners have installed in our haus. Finished reading "the sun also rises." it was a personal challenge because I was a self -proclaimed Hemingway hater. I have since changed my mind because although i might not like all of his subject matter, it is, in fact, pretty well-written.
Also: I've decided the only things you really need to prepare awesome tastys are: a sharp knife, a cutting board, a cast iron skillet, and a pot.
with that said: The things I don't need but am still going to get once my kitchen is finished:) this, this, this, and well, I have some ideas...
DISH recommends:
Lodge Cast iron skillet 12". on sale right now for 27.95. pretty sweet deal considering your grandkids could probably use it (this is mostly directed to those of us without grandkids...or kids of our own...not to say that your lovely, lively grandkids couldn't use it...but only under adult supervision...

Even hell is starting to feel the pains of recession...I hear they started paving their roads with BAD intentions...


Lots of new stuff happening lately. Have been making a lot of changes at the bakery. we are starting to bake a lot of "Miches", which are round 1 kilo loaves of bread that look super cool and if purchased will make you the envy of everyone else in near vicinity. We proof them in baskets which give them a really cool design and then slash and bake them. They are baked a little longer than normal which gives them an excellent crust and also more lasting power. many people also believe that the flavor of the bread actually changes and improves over the first few days. if you haven't been in in a while, be sure to stop in and check out the new stuff. Have been working on a take and bake croissant process also. Did a few today at my house and they were awesome. I just set them (frozen croissants) out overnight on my countertop (on a sheet pan and brushed with veg. oil) to proof and when I woke up this morning, they were ready to go. they had great oven spring and lots of great layers when cut open. Flaky, buttery, goodness has never been easier to achieve! which is good, because flaky, buttery sadness...well, that road just leads to loneliness...
Also picked up a trainer for wifeshow and I to hook up to our bikes so we can ride inside during this crummy weather. I had to do something...was starting to get pretty crazy. It's been a really great addition to my reg. workout and I already can't imagine not having it. i like to watch dvd's of tv shows (arrested development, currently) while i am riding, an episode is just under 30 minutes, which is a decent amount for an indoor ride. Also, picked up (and received) some new kitch gear recently. sur la table in omaha had some all clad mc2 stuff on clearance and I also picked up a Shun santoku knife. I love both of them equally...simultaneously. I have been really impressed with the shun stuff that I have and would definitely recommend them to peeps. Also received an all-clad grill pan from my pal nick. used it to make some pork chops and was really impressed with the even heat it produced. have a feeling that it's going to get some major usage in the months to come. Have also been reading quite a few books lately. Most notably, the girl with the dragon tattoo. was a great thriller, pick it up for a really good read.
ok, getting too sidetracked...FOOD! I can't say enough about jamie oliver's new cookbook. everything i have made from it has been so good. the meatball dish was a little spin-off of his recipe for "pot roast meatloaf". the combination of smoked paprika, tomatoes, bacon, and chickpeas makes for one crazy delicious end product. please try this one out, you won't be disappointed. other dish is a vegetable jalfrezie that I served with papadum and rice. also from the same cookbook. can't say enough good things...
Pot roast meatloaf: (adapted from Jamie's food revolution) serves 4 hungrys or six regs.
2 onions
olive oil
sea salt and fresh ground peps
1 level teaspoon ground cumin
1 heaped tsp ground coriander
12 cream or plain crackers
2 tsps dried oregano
2 heaped tsps dijon mustard
1 pound ground beef 1 large egg 2 cloves garlic
1 fresh red chile
1 tsp. smoked paprika 2 tbs worcestershire
1 can chickpeas
1 28 oz can tomatoes 2 tbs balsamic vinegar
2 sprigs fresh rosemary
12 slices bacon
1 lemon
for meatloaf:
preheat oven to 475. peel and chop one onion until fine. place in frying pan on med heat with olive oil, salt and peps. add cumin and coriander. stir every 30 seconds or so until they get some color (around 7 min.) transfer to bowl to cool.smash up the crackers and add to the onions along with the mustard, oregano, and ground beef. crack in the egg and a good pinch of salt and pepper.mix well with clean hands (yours or a willing partner's). once mixed, mold into a football shape and rub with a little oil. can be cooked now or wait and refrigerate until needed. when ready to cook, place meat in dutch oven (or baking pan), uncovered. put into preheated oven and turn down temperature to 400F. bake 30 min.
for sauce:
peel other onion and chop fine. peel and slice garlic. finely slice red chile. place onion, garlic, and chile in a large pan over med high heat with olive oil, paprika, and salt and peps. cook around 7 minutes again, until goldy-like. add unpronounceable sauce that starts with a wor, chickpeas, tomatoes, and balsamic. bring to boil and then turn heat down to simmer for about 10 min. taste and ad more salt/peps if needed.
to finish:
pick off rosemary leaves from stalks and put into little bowl. remove meatloaf from oven, and pour off fat into bowl of rosemary leaves. spoon tomato sauce around the meatloaf. lay slices of bacon on top of meatloaf and sauce. scatter over the beefy,rosemary leaves. put dutch oven (uncovered) back into oven for 10-15 minutes or until the bacon is done to your liking and sauce is bubbly and thick and delicious.squeeze some lemon wedges over finished dish and snarf. parsley chiff looks good here...
DISH recommends:
all clad mc2 cookware. loves it...hard. hefty, consistent, and easy cleanup. apparently the things that I love about cookware are also the things I love about trashbags.
shun premier santoku. Love the sharpness of this wifeshow sized knife. actually bought it sort of for her but have been using it a lot:) still love my mac, but shun has moved up in the ranks for me...
Jamies food revolution. A very popular cookbook around our house right now. pick it up, it's well worth it and really easy to follow.

After Dinner Mince...or...up to my knees in these cutleries


I've been wanting to do this post for a long, long, time. I realize that the recommendations I have made throughout this post may seem a little pricey, but If there is only one time you listen to the DISH, let that time be now. While this post may be a little scattered, I hope that it is informative for those thinking about buying a new knife (whether you are just starting to get serious about cooking, or if you are a seasoned cook, looking to upgrade your current cutlery) and also maintaining the knives that you have. We use our knives every day, more than any other tool in the kitchen. They should have our complete respect and we should always go for quality when purchasing them.
ok, photo categories here ( top to bottom): sharpening tools(norton IM200 sharpening system, mac ceramic steel,mac diamond sharpener, and mac IT sharpener), paring knives/misc. knives (mac 4 inch paring, wusthof 3.5 inch paring, mac bird's beak, grapefruit knife (wifeshow), ulu filet knife), slicers/bread knives(mac 11 inch yanagiba, forschner flexible 7-inch filet, mac 10-inch bread knife/slicer, Wusthof 9-inch bread knife), Cleavers (Global 6-inch meat cleaver, Global vegetable cleaver, Mac 6.5 inch cleaver, and Chef's knives (Mac Ultimate series 10 inch chef knife, Henckles 4 star 6-inch).
Over the years, I've amassed a decent collection of cutlery. This certainly does not make me any sort of expert, but I would like to share a few things with you that I have come to understand.
Dish's Rule #1: some of you aren't going to like this one, but I'll say it anyway: It's really hard to find a decent chef's knife for well below the $100 dollar mark. "What?!? how could he?" " I love my trusty chef's knife that I got a super sweet deal on!" While many of you may argue with me on this one, (hey, I tried to go the inexpensive route, see the skinny, flexible boning knife in the "slicer/bread knife" photo? at first it seemed ok, but it has ultimately let me down.) I'm going to have to put my foot down and say you are wrong. I hope that you can eventually look at this as an investment. Yeah, it sucks to spend that much on a single item, but trust me, the moment (but more importantly the next moment, and the next, and so on) you slice through a tomato/pepper/cucumber with no resistance, you'll be hooked. My first "chef's knife" was a henckles 4 star (see photo w/ 2 knife's facing opposite directions). It served me well for a couple years. However, when I started working in a restaurant, I got used to a longer length of knife and was ready to upgrade. So, for my birthday that year, Wifeshow took me to PHG in omaha (I think that they have stopped carrying MAC knives:( ) and bought me the MAC ultimate series 10 inch chef knife. It was totally unexpected. I wouldn't have dropped that amount of coin on myself back then, but if there is anyone out there who is looking for a new chef knife that will outperform most others, this is my recommendation. I can't say enough good things about it. It stays sharp forever with regular "steeling" and I use my stone on it about 2-3 times a year. it is a joy to cut with and so far, I've favored it over all other brands I've tried (Wusthof, Henckles, shun, global, forschner, Kyocera).
DISH's Rule #2: It's all about balance: By this, I mean a couple of things. First, Your knife should have a decent amount of heft. Even the thinner, lighter japanese blades (which I have grown to love, more on that later) aren't so light that they feel like toys. Next, when you rest the knife in the palm of your hand, it should lay reasonably flat, not tipping one way or the other. This makes a big difference during long chopping sessions and, over time, can lead to a duller knife and maybe even wrist problems. The main thing here is that your knife should feel great in your hand. Everyone is different, the best knife for me might not be the one for you and vise versa. however, if you are in the market for a new knife or to upgrade, make sure you do your research. a couple of really good places to go (in omaha, sorry lincolnites) are williams sonoma, sur la table, and PHG. They will let you try their knives out and I think some will even let you cut with them. Or, if you want, just come on over to Casa Dish and I'll let you take mine for a spin. Just not anytime soon, I'm moving, and am super sick right now, probably pig flu.
DISH's Rule #3: I think I'm turning Japanese (I really think so). With the exception of 1 american knife maker, I'm pretty much sold on japanese knives. My favorites, as you can tell from my photos are mac knives and global knives (although Misono and Shun are also very respectable choices) The problem I have with german/european knives is that they take a significant amount of time to sharpen and dull rather quickly compared to their japanese counterparts. This is not to say that german/european knives are bad (henckles and wusthof are two very respected companies), I just prefer Japanese.
DISH's Rule #4: Keep it sharp!: This seems pretty obvious right? at the very least i would recommend getting yourself a good steel. If you plan to go the Japanese route, you can't get a better deal on a ceramic steel than these (white or black). you use a ceramic steel on japanese knives because they are often composed of very hard metals. When sharpening something, the sharpener needs to be harder than the metal being sharpened. This is all rated on a rockwell scale with the typical european knife being in the mid to low fifties and the japanese being in the high fifties to low sixties ("metal steels come in at around 62, white ceramic steel is around 76 and the new black stuff ranks in at 81). I would highly recommend finding out the rockwell scale rating of your knife before you buy, not only to determine the steel you should buy, but it is also good to know that the retailer is knowledgeable enough to tell you this. If you have european knives, I would recommend something like this for a steel. There are a lot of different schools of thought on the proper way to steel a knife. I like to place my steel, tip down, on my cutting board and keep it straight up and down. I then glide my knife from top to bottom, heel to tip, at the proper angle, and then switch sides (10-16 degrees for japanese, 17-25 for european).
Beyond regular "steeling," You may find that your knives need to actually be sharpened. ("steeling just realigns the burrs on your knife's edge, while sharpening takes away a little bit of metal and creates a new rough edge that is ready to be steeled into razor quality.) For this, I recommend (if you are a "do-it your-selfer") the norton Im200 sharpening system. It takes a little practice, but it does come with a handy angle guide to help you get the proper technique down. If you don't want something this bulky, you could always get a couple of plain stones, I would recommend a medium and fine grit. There is the option of getting an automatic or powered sharpener, but I don't think that you will be happy with the results. You can get a much keener edge when you sharpen a knife yourself. My rule is that the finished knife should be able to shave hair off of your arm (don't worry, I always wash the knife afterwards:) You could try cutting a piece of parchment or paper held out loosely in front of you, but that's just a waste of paper, your arm hair grows back. There are also some respected knife sharpeners out there, unfortunately you have to be without your knife for a while. I know that shun will sharpen your knives for free for as long as you have them, but if you wanted to send them somewhere, I would recommend sending them here or here. if there is anywhere around these parts that anyone knows of, let me know.
ok, I hope that this was somewhat informative. I am really passionate about cutlery. A good knife will change the way you cook like nothing else can. You get what you pay for, so please, please, please, save up the coin and buy yourself something respectable. I am going to leave you with a few recommendations here: pieces.
DISH recommends:
for the european-lovers:
euros:

Bread/Slicer: Mac 10.5 inch slicer/bread knife (I like this because you can sharpen it with the mac "IT" sharpener
Literature:
ok, obviously, Any size here would work, I just prefer 10 inch blades on chef knives, and 4 inch on parings.
Other things I should add are: no, I don't find the handles on global knives to become really slippery when wet, and yes, I do have a lot of knives but wifeshow and i use every one of them. she does like the henckles 6 inch chef, because her hands are smaller (and probably because she's german...and stubborn:) I hope this post was informative, albeit a little long. Also, let me know what you guys use for your trusty knives, I am very interested. Also, does anyone out there use a santoku? never have, have always been curious about how they perform.

tart attack!


I didn't notice until just now that two of these pics are soups. haha, well, whatever I guess. So we eat a lot of soup, big deal right? YES! it is a big deal. Beethoven once said, "only the pure of heart can make a good soup." Obviously we never met.
I have been receiving copious amounts of asparagus from my boss's mom. They come into the bakery on saturdays and bring goodies from their farm. I was wondering what to do with all of it when I came across a recipe for cream of asparagus soup. It was in a jamie oliver cookbook (which usually never fails me) so I figured I'd try it out. You start off by sauteing onions and celery together until they become translucent and turn sweet. Then you add only the stalks (reserving the tips of the asparagus for later) of the asparagus and about a quart of chicken stock, bring to a boil, and then turn down to simmer (for about 20 minutes). there isn't actually any cream in the dish, you just get a really creamy consistency from pulsing all the ingredients in a blender. After you have blended the soup, return it to the pot and throw in your reserved asparagus tips. cook them until they are tender-crisp. now, you are almost ready to plate (when you "plate" a soup, is it called bowling?). Garnished with a poached egg and toast and it was pretty much all over after that. the velvety egg yolk melds well with the freshness of the soup and you get an intense blast of spring in your mouth. the only other way I know how to achieve this is by swallowing a slinky, and I would NOT recommend that.
Let's see...other soup is a french tomato soup. It's a tomato soup that's heavy on the onions and seasoned with herbs de provence (dried basil, thyme, fennel seed, and oregano.) and then garnished with chevre. I placed a crostini in the bottom before I ladled in the soup. and then I had another. I love all things crunchy. especially things of the crouton variety.
that tart of a dish you see on the right is actually an almondy jam tart. It's super simple, just flour butter sugar, ground almonds, pinch o' salt pulsed in the queez and then pressed into a tart pan (with a removable bottom) and baked for about 15 min. After that, you just spread jam over the top and throw it back into the oven until it starts to bubble. Just let it cool...hot jam is actually, pretty hot, trust me.
DISH recommends:
tart pan with removable bottom: You can do lots of treats in here. Quiches, tarts, cakes, pies, whatever you want. I thought I would never use this but I actually use it quite a bit. this is just the first one I could find, maybe there are better deals out there, maybe not. I can't remember how much I paid for mine.

gelato ticket


I'm the type of person that can't stand to have things in my possession that I don't use (just ask my gallbladder). I hate knowing that something is just lying around gathering dust, when it could be put to good use. So, naturally, I had become quite frustrated with owning an ice cream maker. Honestly, up until last week, we had used it once or twice in three years, and that's just ridiculous. I decided that it was way past time to give it another try and so on our day off together, we made some mint chocolate chip gelato. Gelato is an italian ice cream that uses infused milk and is a bit more dense than traditional ice cream. you make a custard and whisk it into the milk and then add it to your ice cream maker. I'm really glad that I tried making this because now that I have the method down, I will experiment with it a lot.
Last thursday, It was so nice outside that I decided to have some grill time. Meat treats over high heats equals tasty eats. I made an adobo spice rub out of garlic, lime zest, paprika, black pepper, cumin, kosh, and olive oil (at least I think that's all that I put in). Rubbed it on some chicken breasts and then seared them over high heat and then backed them off to finish cooking. ok, I'd like to take a moment here to talk about why spice pastes rule. well, for starters, they're a huge time saver. I have nothing against marinades, per se, it's just that they take so much time. a spice paste crams all that flavor into a concentrated form that you can basically cook with in little to no time at all. the difference in time is like comparing riding a bus in mexico (just ask wifeshow, now THAT was a fun day!) to traveling warp speed on the enterprise (sorry, I saw star trek over the weekend, good flick, recommends it.) ok, sorry, back to the chicken...I sliced them thin and served them on some grilled tortillas with red cabbage, grilled scallion, avocado, and lime squirtys. Delicious!
ok, last pic. Wife and I made pasta on sunday. If there is one recipe I post that I really want you to try, it's this one. The difference is totally ridiculous, in a good way. ok, maybe not this ridiculous (ok, seriously, well, two things. That is a frisbee hanging from her belt, I know because I had that frisbee and she is wearing a wedding ring, which means her husband probably took that picture. I'm totally speechless.) but still... It really doesn't take that much time, and it is so worth it. Having a roller will definitely help your cause, you could try it without, but it will be a lot of work.
Tuscan Pasta dough (variation from bon appetit)
1.25 cup durum semolina flour
2 eggs
1 tbs olive oil (eyeballed it)
1 tbs salt (" ")
2 methods here. You can mix the dry ingredients together in a bowl, make a well in the center and add the wet ingredients, using a fork to blend everything together top make a rough dough, or you can just whizz it into a food processor and jog the button a couple of times to get the same result (I use to do it by hand...I use to think I was being old school, now I know I was just being silly.) turn your dough out onto a floured surface and knead until smooth, about 5 minutes. cut it in two, make balls out of it and flatten them into disks. cover with plastic wrap and let it rest for 30 minutes. ( If you are going to be more than half an hour, knock it into the fridge until you can get to it later, just take it out about 30 minutes before you plan on rolling.
Set pasta machine to the widest setting( usually "1") and feed the dough through about 4 times (or until super smooth). now cut your dough in two. Cover one half with a towel and take the other half and feed it through the next narrowest setting about 2 times, switching to the next setting after every 2nd time. (I did this until I got to setting"5", the second to last setting.) the pasta will be about 2 feet long and pretty thin, like 1/16 inch (make sure to lay it on a lightly floured surface and lightly flour the top also, this will make cutting and unraveling way easier!). Now loosely roll your pasta strip until it looks like a scroll of dough. cut into desired width with a sharp knife. Repeat process with remaining dough (s). You can either hang your pasta to dry or let it dry on parchment for about 20-30 minutes. Now you are ready for the sauce of your choice, or veggies, or just olive oil and parmesan. make sure to only boil for about 3-4 minutes, time may vary slightly, serve al dente. enjoys!
DISH recommends:
A pasta machine/roller. This one is made by norpro. about 40 clams. they usually make good stuff. I think I have an "imperia." but don't want to go check right now. while this does have the potential to be a "dust gatherer," this pasta dough is so good, you won't want to return to the land of the inferior dried stuff. use it well.


Mr. greenjeans


hello, friendlies!  how are all of you?  fine?  I thought so.  So, so much to do today in so little time, but I shall do my best.  I am ridiculously excited to tell you that the picture of the lettuce(s) was picked from my very own garden.  Growing lettuce is so easy and it tastes so much better than anything you can get in the store.  This is a blend of mesclun, microgreens, and spinach,  and was tasty for days.
ok, other food pics.  Used the leftover brisket to make hot beef sandwiches.  Basically, just chop up the beef, and simmer it in stock, make some mashed tates and when you are ready to eat, plate it on top of a healthy hunk of country bread, and top with the mash and the beef.  serve with a green veg (I chose broccoli).  Also made a vegetable soup at the beginning of the week.  I was feeling that I needed a vitamin boost.  Into I put: onions, leeks, pablano peppers, serrano peppers, garlic, rainbow carrots, sweet potatoes, russet potatoes, green beans, collard greens, kale, and tomatoes. Very good stuff.  I also used some of the leftovers to make a curry (just reduced the soup down and added indian spices, frugal?  Yes, tasty?  duh.), hey, I like to stretch my leftovers taffy thin.  
other newsums:  It is wife and I's anniversh (3 years) on wednesday!  So buy us some leather goods (we prefer satchels), or just wish us well, either way...it's up to you.  We were going to go all out and eat dinner at V Mertz, but we decided to stay home instead.  here is our proposed menu for wednesday (pending the fact that we can get everything we need)
1st course:  applewood smoked, apple cider glazed pork belly w/ salad of microgreens
2nd course: Beef Filet Oscar with pommes de terre Noisettes (basically, a tiny, round french fry) and caramelized brussels sprouts.  
wine: Terrazas de los Andes Malbec, 2007, Argentina
dessert: assorted cheese plate and mint-chocolate chip gelato (If I can get to making it).
wine: Rudolf Mueller Eiswein, Germany
we'll see what actually makes it onto the plate.
DISH recommends:
OXO salad spinner.  Yeah, ok, I know you can soak your greens and dry them on paper towels, but that's a waste of paper, you only buy the salad spinner once. 30 clams.